Building a Website Screenshot API with Puppeteer and Google Cloud Functions
In this blog post, I describe the steps I took to set up this API, let’s dive in!
Puppeteer
Puppeteer is a node package that allows you to control a headless chrome browser using Javascript. A headless chrome browser is just a browser without a window.
I can use this package to spin up a headless chrome instance, navigate to a website and take a screenshot.
To start I’m going to create a local node project and install the puppeteer package.
npm init
npm install puppeteer
Now I can create a file called index.js
and add the following code.
const puppeteer = require('puppeteer');
takeScreenshot()
.then(() => {
console.log("Screenshot taken");
})
.catch((err) => {
console.log("Error occured!");
console.dir(err);
});
async function takeScreenshot() {
const browser = await puppeteer.launch();
const page = await browser.newPage();
await page.goto("https://medium.com", {waitUntil: 'networkidle2'});
const buffer = await page.screenshot({
path: './screenshot.png'
});
await page.close();
await browser.close();
}
Note that I am making the takeScreenshot()
function async
. This way I can use the await keyword in the function to wait for all the promises.
After running the code I get the following screenshot! 🎉
Google Cloud Functions
So I now have a local script that I can call to take a screenshot, but I want to build an API. The next logical step is to put this script on a server somewhere.
I don’t want to worry about my server running out of memory, so I’m going to put it on Google Cloud Functions. This way it can handle a huge number of requests without me having to worry about buying more RAM memory.
Once I have the cloud function running, I can call it with an HTTP request — meaning that I will have a working screenshot API 🚀
Let’s port the previous code to the Google Cloud Function format. The cloud function I created is async
and called run()
.
So far I have a working screenshot API. But I’m going to extend it by uploading the screenshots directly to Google Storage.
I’m going to use the @google-cloud/storage
npm package for this.
Note that I have created a Google Cloud Storage bucket called screenshot-api
checkout this page for how to set up a storage bucket.
const puppeteer = require('puppeteer');
const { Storage } = require('@google-cloud/storage');
const GOOGLE_CLOUD_PROJECT_ID = "portfolio-umut-yildirim";
const BUCKET_NAME = "screenshot-jobs-portfolio-umut-yildirim";
exports.run = async (req, res) => {
res.setHeader("content-type", "application/json");
try {
const buffer = await takeScreenshot(req.body);
let screenshotUrl = await uploadToGoogleCloud(buffer, req.body.name+".png");
res.status(200).send(JSON.stringify({
'screenshotUrl': screenshotUrl
}));
} catch(error) {
res.status(422).send(JSON.stringify({
error: error.message,
}));
}
};
async function uploadToGoogleCloud(buffer, filename) {
const storage = new Storage({
projectId: GOOGLE_CLOUD_PROJECT_ID,
});
const bucket = storage.bucket(BUCKET_NAME);
const file = bucket.file(filename);
await uploadBuffer(file, buffer, filename);
await file.makePublic();
return `https://${BUCKET_NAME}.storage.googleapis.com/${filename}`;
}
async function takeScreenshot(params) {
const browser = await puppeteer.launch({
args: ['--no-sandbox']
});
const page = await browser.newPage();
await page.goto(params.url, {waitUntil: 'networkidle2'});
const buffer = await page.screenshot();
await page.close();
await browser.close();
return buffer;
}
async function uploadBuffer(file, buffer, filename) {
return new Promise((resolve) => {
file.save(buffer, { destination: filename }, () => {
resolve();
});
})
}
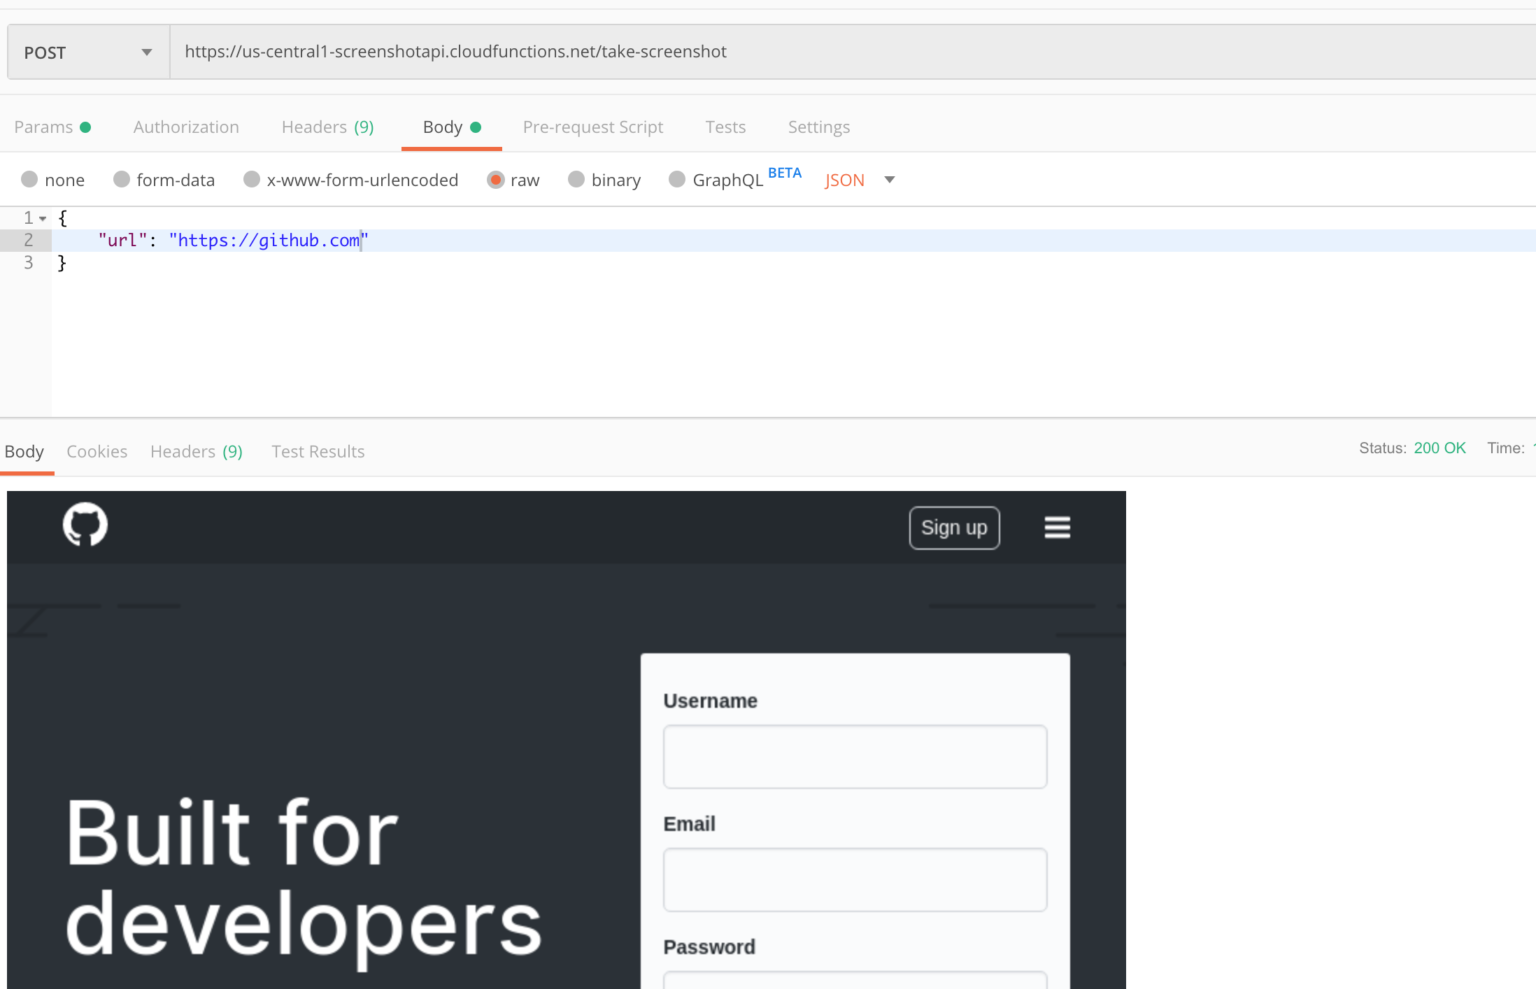
The new result — My postman client is showing the URL to the screenshot 🚀
Note that in the code above each screenshot is saved as screenshot.png on Google Storage. In the real world, you would need to generate a random id for each image.
Conclusion
Here’s the source of a Google Cloud function that, using Puppeteer, takes a screenshot of a given website and store the resulting screenshot in a bucket on Google Cloud Storage. This was a fun project to do.
You can find the source code of the completed Google Cloud function and package.json here.
Thanks for reading!